Create a simple MERN Stack application

Hi guys! Today I brought you an article which is rich in many technologies.. As soon as you heard the title of the article, what comes to your mind? What is MERN STACK? Sometimes, you may have heard MEAN STACK.. Is there any difference between these two? Ya..definitely! The biggest difference is the front-end implementation of two stacks.
MERN means, MongoDB, ExpressJS, ReactJS and NodeJS.. So in the application I create in this article, Backend will be implemented with ExpressJS and frontend will be created using ReactJS.
Let's start!
Special Note: I will use some of my previous articles to give you more explanations. Please refer the links in relevant sections. Otherwise, this article will be a boring and a long one!
Back-end API Implementation
Steps to follow:
1. Initiate the project
2. Implement Express server
3. Connect to MongoDB
4. Create a Schema for the database
5. Create a Rest Controller
6. Implement CRUD functionalities with routing
So guys, if you are following my blog, I have already created a REST API using ExpressJS and MongoDB. Therefore I won't be repeat the same thing again..You can create a full functioning REST API referring to this link. Go there and start your back-end implementation guys! Hurry up!
https://salitha94.blogspot.com/2018/09/create-rest-api-in-express-and-mongodb.html
Only the scenario will be changed! Here I use a CRUD for users. In my post, it has been done for posts. That's the only difference!
So, create a database called api and a collection called users in MongoDB. If you have no understanding on mongodb, click the below link.
Link : https://salitha94.blogspot.com/2018/05/database-crud-operations-with-mongdb.html
Insert some documents into you database.
However, The back-end files for this project will be available here.
API folder - api
UI folder - client
api/app.js
api/models/User.js
api/routes/router.js
Have you done guys? You can test the API following the steps in the above article..Test it before using it.
Run the API using node app.js or node index.js according to your project setup!
Now I will show the way to build our front-end.
Front-end Implementation
1. Create React application and install Axios
Let's create a fresh React project using command line. Open a cmd/terminal and type the below command. You can give any name.
create-react-app mern-app
2. Create components
Inside the project, there's a folder called src. Open it and create a folder called components. Place all the components in this folder. This is not compulsory. But as a best practice do this. This is the structure of the project.
3. Install React router and implement routing mechanism
Open a terminal and install React router using this command.
npm install --save react-router-dom
Now open App.js and configure the routes for each component. Then Home will be the root component for our project.src/App.js
src/components/Home.js
import React, { Component } from 'react'

class Home extends Component {
  render() {
    return (
      <div style={{marginTop: "100px"}}>
       <h1> Welcome To MERN STACK application!</h1>
      </div>
    )
  }
}
export default Home;
import React, { Component } from 'react';
import { Link } from 'react-router-dom';

class Navbar extends Component {
  render() {
    return (
    <div className="Navbar">
        <nav className="navbar navbar-expand-lg navbar-dark bg-dark">
            <a className="navbar-brand" href="/">MERN STACK APP</a>
            <button className="navbar-toggler" type="button" data-toggle="collapse" data-target="#navbarSupportedContent" aria-controls="navbarSupportedContent" aria-expanded="false" aria-label="Toggle navigation">
                <span className="navbar-toggler-icon"></span>
            </button>

            <div className="collapse navbar-collapse" id="navbarSupportedContent">
                <ul className="navbar-nav mr-auto">
                <li className="nav-item active">
                    <Link
                        className="nav-link" to="/">Home
                    </Link>
                </li>
                <li className="nav-item">
                    <Link className="nav-link" to="/users">users
                    </Link>
                </li>
                <li className="nav-item">
                    <Link className="nav-link" to="/add">Add user
                    </Link>
                </li>
                </ul>
            </div>
        </nav>
    </div>
    )
  }
}
export default Navbar;
4. Load data from back-end
We have to install a HTTP client to handle data with back-end. So, Axios is the most used client as I know. I will choose it. Install in using this command.
npm install --save axios
Now we are ready to use axios. If you want more explanations on Axios, kindly refer one of my previous articles.
Now it's time to view all users!
I will open my Users.js component. I have to do a GET call to my express back-end to get all the users to my component.
import React, { Component } from 'react'
import axios from 'axios';
import userImg from '../assets/user.png';
import { Link } from 'react-router-dom';

class Users extends Component {
    constructor(props) {
        super(props);
        this.state = {
          users: []
        }
      }

    componentDidMount() {
        axios.get('http://localhost:4000/api/users')
        .then(res => {
            console.log(res);
            this.setState({ users: res.data })
        });
    }

    render() {

        var data = this.state.users;

        return (
        <div className="users" style={{marginTop: "50px"}}>
            <div className="container">
            <div className="row">
                {data.length > 0 ?
                    data.map((user, i) => {
                        return (
                            <div className="col-lg-6" key={user._id.toString()}>
                                <div className="card" style={{ marginBottom: "20px"}}>
                                    <div className="card-header text-left">{user.name}</div>
                                    <div className="card-body text-left">
                                        <div className="row">
                                            <div className="col-lg-3">
                                                <img className="img-thumbnail" style={{marginBottom: "10px"}} src={userImg} alt="user"/><br/>
                                                <Link to={"users/"+user._id}>
                                                    <button className="btn btn-outline-dark btn-sm">View User</button>
                                                </Link>
                                            </div>
                                            <div className="col-lg-9">
                                                <ul className="list-group">
                                                    <li className="list-group-item"><b>Email </b>: {user.email}</li>
                                                    <li className="list-group-item"><b>Job </b>: {user.job}</li>
                                                    <li className="list-group-item"><b>Phone </b>: {user.phone}</li>
                                                </ul>
                                            </div>
                                        </div>
                                    </div>
                                </div>
                            </div>
                        )}
                    ) : null}
                </div>
            </div>
        </div>
        );
    }
}
export default Users;
In axios response, I set the state of users array to res.data..Then we have the object array of users stored in users array. API end point is => http://localhost:4000/api/users
Now run the React project and see the result on our routes.
http://localhost:3000/users
You will see a view like this...

In this way, you can implement the other components also.. User component will be also having GET call to our end point => http://localhost:4000/api/users/id to fetch one user by ID.
Now it's time to view a user by ID!
We have to perform axios GET request with a parameter for ID. The details of a user will be fetched then from our database. User's view...

You can see a button to delete the user. Here, we have to do a POST request to our REST API. Because we have to submit some kind of form data to the back-end to identify the correct user to be deleted. I have designed a form for delete button and set a function called deleteUser to remove the user. Then I implemented the deleted logic with the help of Axios within the function body.
Now it's time to edit a user!Now run the React project and see the result on our routes.
http://localhost:3000/users
You will see a view like this...
In this way, you can implement the other components also.. User component will be also having GET call to our end point => http://localhost:4000/api/users/id to fetch one user by ID.
import React, { Component } from 'react'
import axios from 'axios';
import userImg from '../assets/user.png';
import { Link } from 'react-router-dom';
import { Redirect } from 'react-router';

class User extends Component {
  constructor(props) {
    super(props);
    this.state = {
      user: {},
      redirect: false
    }
    this.deleteUser = this.deleteUser.bind(this);
  }

  componentDidMount() {
      axios.get(`http://localhost:4000/api/users/${this.props.match.params.id}`)
      .then(res => {
        console.log(res)
          this.setState({ user: res.data })
      });
  }

  deleteUser(event) {
    event.preventDefault();
    console.log(this.state.user._id)
    axios.post(`http://localhost:4000/api/users/delete/${this.state.user._id}`)
      .then(res => {
        console.log(res)
          this.setState({ redirect: this.state.redirect === false })
      });
  }

  render() {
    return (
      <div className="container" style={{marginTop: "50px"}}>
        <div className="card text-left">
          <div className="card-header">Name : {this.state.user.name}</div>
              <div className="card-body">
                <div className="row">
                  <div className="col-lg-3">
                  <img className="img-thumbnail" style={{marginBottom: "10px"}} src={userImg} alt="user"/><br/>
                  </div>
                  <div className="col-lg-9">
                    <p className="card-text">Email : {this.state.user.email}</p>
                    <p className="card-text">Phone : {this.state.user.phone}</p>
                    <p className="card-text">Job : {this.state.user.job}</p>
                    <p className="card-text">Company : {this.state.user.company}</p>
                    <p className="card-text">Age : {this.state.user.age}</p>
                    <p className="card-text">City : {this.state.user.city}</p>
                  </div>
                </div>
                  <hr/>
                  <div className="row" style={{marginLeft: "0px"}}>
                    <Link to={this.state.user._id+"/edit"}>
                      <button className="btn btn-primary">Edit user</button>
                    </Link>
                    <form onSubmit={this.deleteUser}>
                      <button type="submit" className="btn btn-danger" style={{marginLeft: "10px"}}>Delete</button>
                    </form>
                  </div>

                  {this.state.redirect && (
                    <Redirect to={'/users'}/>
                  )}

              </div>
          </div>
      </div>
    )
  }
}
export default User;
Now it's time to view a user by ID!
We have to perform axios GET request with a parameter for ID. The details of a user will be fetched then from our database. User's view...
You can see a button to delete the user. Here, we have to do a POST request to our REST API. Because we have to submit some kind of form data to the back-end to identify the correct user to be deleted. I have designed a form for delete button and set a function called deleteUser to remove the user. Then I implemented the deleted logic with the help of Axios within the function body.
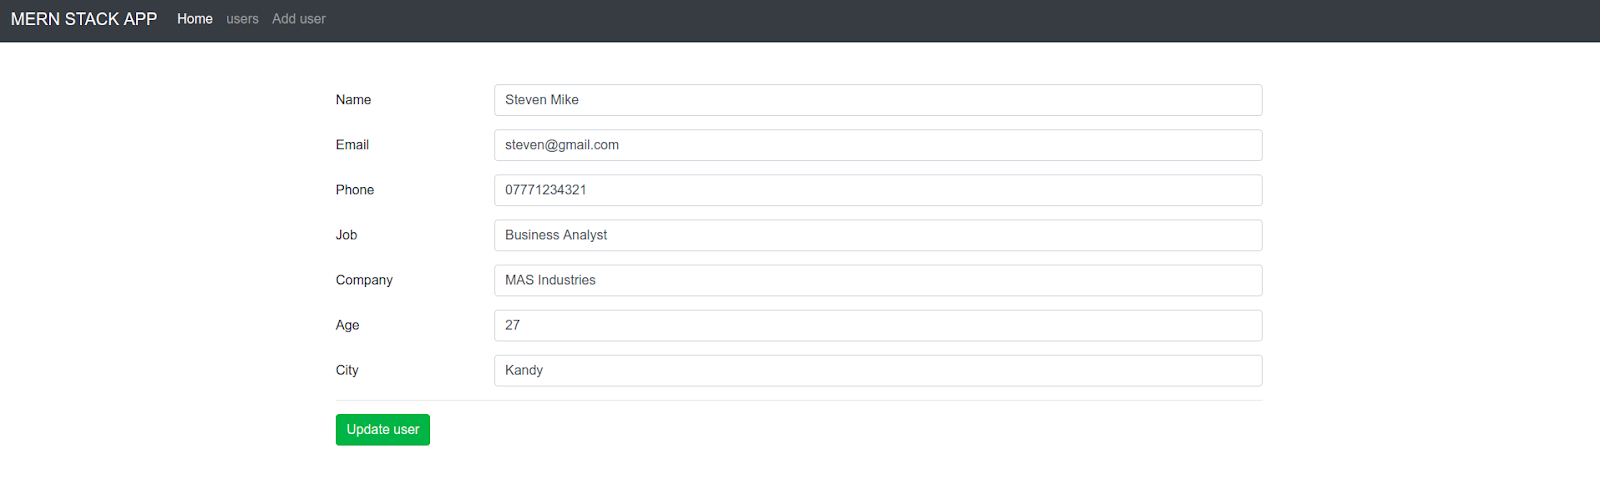
Here, edit User is a link to navigate to a route => http://localhost:3000/users/id/edit
Then EditUser component will be rendered with a Form filled with the data of the user. Then details can be edited and updated!
There must be handler methods to control our inputs! They are implemented..See the code. You can identify them easily by their names.
Update button again do a submit action for another form. It takes the updated data and send to back-end API to update user. EditUser component code is given below.
src/components/EditUser.js
import React, { Component } from 'react'
import axios from 'axios';
import { Redirect } from 'react-router';

class EditUser extends Component {
  constructor(props) {
    super(props);
    this.state = {
        name: "",
        email: "",
        phone: "",
        job: "",
        company: "",
        age: "",
        city: "",
        redirect: false
    }
    this.handleNameChange = this.handleNameChange.bind(this);
    this.handleEmailChange = this.handleEmailChange.bind(this);
    this.handlePhoneChange = this.handlePhoneChange.bind(this);
    this.handleJobChange = this.handleJobChange.bind(this);
    this.handleCompanyChange = this.handleCompanyChange.bind(this);
    this.handleAgeChange = this.handleAgeChange.bind(this);
    this.handleCityChange = this.handleCityChange.bind(this);
    this.updateUser = this.updateUser.bind(this);
  }

  componentDidMount() {
    axios.get(`http://localhost:4000/api/users/${this.props.match.params.id}`)
    .then(res => {
        this.setState({
            name: res.data.name,
            email: res.data.email,
            phone: res.data.phone,
            job: res.data.job,
            company: res.data.company,
            age: res.data.age,
            city: res.data.city
        })
        console.log(res)
    });
  }

  handleNameChange(e) {
    this.setState({name: e.target.value})
  }

  handleEmailChange(e) {
    this.setState({email: e.target.value})
  }

  handlePhoneChange(e) {
    this.setState({phone: e.target.value})
  }

  handleJobChange(e) {
    this.setState({job: e.target.value})
  }

  handleCompanyChange(e) {
    this.setState({company: e.target.value})
  }

  handleAgeChange(e) {
    this.setState({age: e.target.value})
  }

  handleCityChange(e) {
    this.setState({city: e.target.value})
  }

  updateUser(event) {
    event.preventDefault();
    const userUpdate = {
        name: this.state.name,
        email: this.state.email,
        phone: this.state.phone,
        job: this.state.job,
        company: this.state.company,
        age: this.state.age,
        city: this.state.city
    }
    console.log(userUpdate)
    axios.post(`http://localhost:4000/api/users/update/${this.props.match.params.id}`, userUpdate)
    .then(res => {
        console.log(res);
        this.setState({ redirect: this.state.redirect === false })
    })
    .catch(err => { console.log(err) });
  }

  render() {
    return (
      <div className="container" style={{marginTop: "50px"}}>
        <form onSubmit={this.updateUser} method="user">
        <div className="form-group row">
                    <label className="col-sm-2 col-form-label text-left">Name</label>
                    <div className="col-sm-10">
                        <input type="text" className="form-control" onChange={this.handleNameChange} name="name" value={this.state.name}/>
                    </div>
                </div>
                <div className="form-group row">
                    <label className="col-sm-2 col-form-label text-left">Email</label>
                    <div className="col-sm-10">
                        <input type="text" className="form-control" onChange={this.handleEmailChange} name="email" value={this.state.email}/>
                    </div>
                </div>
                <div className="form-group row">
                    <label className="col-sm-2 col-form-label text-left">Phone</label>
                    <div className="col-sm-10">
                        <input type="text" className="form-control" onChange={this.handlePhoneChange} name="phone" value={this.state.phone}/>
                    </div>
                </div>
                <div className="form-group row">
                    <label className="col-sm-2 col-form-label text-left">Job</label>
                    <div className="col-sm-10">
                        <input type="text" className="form-control" onChange={this.handleJobChange} name="job" value={this.state.job}/>
                    </div>
                </div>
                <div className="form-group row">
                    <label className="col-sm-2 col-form-label text-left">Company</label>
                    <div className="col-sm-10">
                        <input type="text" className="form-control" onChange={this.handleCompanyChange} name="company" value={this.state.company}/>
                    </div>
                </div>
                <div className="form-group row">
                    <label className="col-sm-2 col-form-label text-left">Age</label>
                    <div className="col-sm-10">
                        <input type="text" className="form-control" onChange={this.handleAgeChange} name="age" value={this.state.age}/>
                    </div>
                </div>
                <div className="form-group row">
                    <label className="col-sm-2 col-form-label text-left">City</label>
                    <div className="col-sm-10">
                        <input type="text" className="form-control" onChange={this.handleCityChange} name="city" value={this.state.city}/>
                    </div>
                </div>
            <hr/>
            <div style={{marginLeft: "0px"}} className="row">
                <button type="submit" className="btn btn-success" style={{marginLeft: "0px"}}>Update user</button>
            </div>
        </form>
        {this.state.redirect && (
            <Redirect to={'/users'}/>
        )}
      </div>
    )
  }
}
export default EditUser;
Let's add a new user!
How to add a new user? We have to do a POST request again guys! We need to send form data and insert into database. As we did in editing users, here also we need handler methods to control state values of input fields. AddUser component can be found below..
src/components/AddUser.js
import React, { Component } from 'react';
import axios from 'axios';
import { Redirect } from 'react-router';

class AddUser extends Component {
    constructor(props) {
        super(props);
        this.state = {
            name: "",
            email: "",
            phone: "",
            job: "",
            company: "",
            age: "",
            city: "",
            redirect: false
        }
        this.handleNameChange = this.handleNameChange.bind(this);
        this.handleEmailChange = this.handleEmailChange.bind(this);
        this.handlePhoneChange = this.handlePhoneChange.bind(this);
        this.handleJobChange = this.handleJobChange.bind(this);
        this.handleCompanyChange = this.handleCompanyChange.bind(this);
        this.handleAgeChange = this.handleAgeChange.bind(this);
        this.handleCityChange = this.handleCityChange.bind(this);
        this.addUser = this.addUser.bind(this);
      }

      handleNameChange(e) {
        this.setState({name: e.target.value})
      }

      handleEmailChange(e) {
        this.setState({email: e.target.value})
      }

      handlePhoneChange(e) {
        this.setState({phone: e.target.value})
      }

      handleJobChange(e) {
        this.setState({job: e.target.value})
      }

      handleCompanyChange(e) {
        this.setState({company: e.target.value})
      }

      handleAgeChange(e) {
        this.setState({age: e.target.value})
      }

      handleCityChange(e) {
        this.setState({city: e.target.value})
      }

      addUser(event) {
        event.preventDefault();
        const userAdd = {
            name: this.state.name,
            email: this.state.email,
            phone: this.state.phone,
            job: this.state.job,
            company: this.state.company,
            age: this.state.age,
            city: this.state.city
        }
        console.log(userAdd)
        axios.post('http://localhost:4000/api/users/add', userAdd)
        .then(res => {
            console.log(res);
            this.setState({ redirect: this.state.redirect === false });
        })
        .catch(err => { console.log(err) });
      }

    render() {
        return (
            <div className="container" style={{marginTop: "50px"}}>
            <form onSubmit={this.addUser} method="user">
                <div className="form-group row">
                    <label className="col-sm-2 col-form-label text-left">Name</label>
                    <div className="col-sm-10">
                        <input type="text" className="form-control" onChange={this.handleNameChange} name="name" value={this.state.name}/>
                    </div>
                </div>
                <div className="form-group row">
                    <label className="col-sm-2 col-form-label text-left">Email</label>
                    <div className="col-sm-10">
                        <input type="text" className="form-control" onChange={this.handleEmailChange} name="email" value={this.state.email}/>
                    </div>
                </div>
                <div className="form-group row">
                    <label className="col-sm-2 col-form-label text-left">Phone</label>
                    <div className="col-sm-10">
                        <input type="text" className="form-control" onChange={this.handlePhoneChange} name="phone" value={this.state.phone}/>
                    </div>
                </div>
                <div className="form-group row">
                    <label className="col-sm-2 col-form-label text-left">Job</label>
                    <div className="col-sm-10">
                        <input type="text" className="form-control" onChange={this.handleJobChange} name="job" value={this.state.job}/>
                    </div>
                </div>
                <div className="form-group row">
                    <label className="col-sm-2 col-form-label text-left">Company</label>
                    <div className="col-sm-10">
                        <input type="text" className="form-control" onChange={this.handleCompanyChange} name="company" value={this.state.company}/>
                    </div>
                </div>
                <div className="form-group row">
                    <label className="col-sm-2 col-form-label text-left">Age</label>
                    <div className="col-sm-10">
                        <input type="text" className="form-control" onChange={this.handleAgeChange} name="age" value={this.state.age}/>
                    </div>
                </div>
                <div className="form-group row">
                    <label className="col-sm-2 col-form-label text-left">City</label>
                    <div className="col-sm-10">
                        <input type="text" className="form-control" onChange={this.handleCityChange} name="city" value={this.state.city}/>
                    </div>
                </div>
                <hr/>
                <div style={{marginLeft: "0px"}} className="row">
                    <button type="submit" className="btn btn-warning" style={{marginLeft: "0px"}}>Add User</button>
                </div>
            </form>
            {this.state.redirect && (
                <Redirect to={'/users'}/>
            )}
          </div>
        );
    }
}

export default AddUser;

Now you can add users also! route => http://localhost:3000/add
This is the end of building components for this project.. So now you can run the complete project!
Go into client folder and type npm start to run front-end on your browser.
Full Source Code : https://github.com/SalithaUCSC/MERN-Stack-UserBook
I have to wrap up guys now! Since this article cover a wider area, article is long a bit..I tried to write it to give some basic ideas also..For beginners, it will be useful..So, this is the end of another React JS + Express JS article..
I will come up with more React ones in future..
Good Bye!!!


57 Comments
Than you for the comment! I will provide more articles..Keep in touch!
ReplyDeleteThank you FullStack!
ReplyDeleteThank you Anjali :D keep in touch!
ReplyDelete
ReplyDeleteThanks for sharing this blog.This article gives lot of information.
Full Stack online Training
Full Stack Training
Full Stack Developer Online Training
Full Stack Training in Hyderabad
Full Stack Training in Ameerpet
Full Stack Training Institute
Thanks Vishnu Priya!
DeleteThank you for sharing and its was very very usefully to me and nice blog
ReplyDeleteMeanstack Online Training
Meanstack Training
Meanstack Training in Hyderabad
Meanstack Training in Ameerpet
Thank you very much Ramakrishna!
DeleteThis comment has been removed by the author.
ReplyDeleteThanks a lot! Nice to hear..
DeleteThanks for sharing the valuable information.
ReplyDeleteMeanstack Online Training
Meanstack Training in Hyderabad
Meanstack Training in Ameerpet
Thank you again :D
DeleteThank you for sharing very useful information.
ReplyDeleteAngular JS Online training
Angular JS training in hyderabad
Thanks a lot Kavya!
DeleteThanks a lot Kavya!
ReplyDeleteMern stack online training
ReplyDeleteMern stack training in hyderabad
Very impressive article! The blog is highly informative and has answered all my questions. To introduce about our company and the activities, Techno Data Group is a database provider that helps you to boost your sales & grow your business through well-build MongoDB Users Email.
ReplyDeleteThanks a lot Jack! nice to hear such a feedback!
DeleteThank you very much buddy :D
ReplyDeleteThis is a nice blog, very useful content. I like your post
ReplyDeleteNode JS Online training
Node JS training in Hyderabad
It's a Very informative blog and useful article thank you for sharing with us, keep posting
ReplyDeleteReact js Online Training
Angular Training
NodeJS Online Training Hyderabad
AngularJS Online Training
Thank you for the feedback :D
DeleteThanks a lot for this tutorial, great tutorial for beginners.
ReplyDeleteAngular JS Online training
Angular JS training in hyderabad
Thank you for the feedback kavyasri :D
DeleteThanks for sharing your valuable information and time.
ReplyDeleteMEAN Stack Training in Delhi
MEAN Stack Course in Delhi
Thank you for the feedback manisha!
DeleteOur industry renowned MEAN Stack Developer course can make you an adept professional. You will become an expert on technologies, for example, JavaScript, AngularJS, Express JS, Node JS, Single Page Application, Routing, MVC Concepts, AJAX, JSON MongoDB etc. Students at our institute can expect to chip away at real projects to render them ready for the professional world.
ReplyDeleteFor More Info: MEAN Stack Training in Gurgaon
Thank you
DeleteThis is really helpful and informative, as this gave me more insight to make more ideas and solutions.keep update with your blog post.
ReplyDeleteMean stack online training
Mean stack training in hyderabad
Thank you for the feedback :D
DeleteWe at APTRON GURGAON, the best institute for MEAN stack Training in Gurgaon help students to learn MEAN stack with the help of live base projects.
ReplyDeleteFor More Info: MEAN Stack Training in Gurgaon
Thank You!
DeleteThank you Tibco! nice reader! :D
ReplyDeletegreat work
ReplyDeleteThank u bro
ReplyDeleteThank you Isuru :D
DeleteGreat Post, Thanks for sharing such a wonderful information.
ReplyDeleteReact JS Online Training
React JS Online Course
React JS Online Training in chennai
Thank you James!
Deletegreat tips At SynergisticIT we offer the best azure training course in california
ReplyDeleteThank you Ravi!
DeleteThanks for sharing this blog. Its written very nicely.
ReplyDeleteMean Stack Training in Noida
Mean Stack Course in Noida
Thank you for your feedback manisha!
DeleteWant to hire mern stack developers the must-visit arka softwares. Arka Softwares is the Leading Mern Stack Development Company providing hourly/full-time Mern Stack Application Development Services.
ReplyDeleteThanks for sharing this Information. Mean Stack Course in Gurgaon
ReplyDeleteI'm getting this error
ReplyDeleteCross-Origin Request Blocked: The Same Origin Policy disallows reading the remote resource at http://localhost...
need help please
I really enjoy the blog article.Much thanks again.
ReplyDeletejava training
java online training
Really awesome blog, Informative and knowledgeable content. Keep sharing more with us.
ReplyDeleteMean Course Training in Hyderabad
Excellent blog, informative and knowledgeable content. Thanks for sharing this blog with us.
ReplyDeletePython Online Training in Hyderabad
Awesome Article Thanks for sharing your valuable information Are you seeking a Hire mern stack developer to start your own new business? You've arrived at the right location. For your business startup, we offer a customizable multi-service platform that all-in-one solution.
ReplyDeleteThanks for sharing this informative article on Create a simple MERN Stack application. If you want to Hire MERN Stack Developer for your project. Please visit us.
ReplyDeleteThis comment has been removed by the author.
ReplyDeleteDICS is a Best digital marketing institute in GTB Nagar offering extensive courses to aspiring marketers.
ReplyDeleteThis comment has been removed by the author.
ReplyDeleteGreat article on setting up a Raspberry Pi Node.js webserver with WebSocket for LED control! For those interested in web development, check out the Best Laravel Training Course in Surat to enhance your backend skills even further.
ReplyDeleteT10 Exchange offers seamless online gaming and sports exchange experiences. With a user-friendly interface, diverse game options, secure transactions, and 24/7 customer support, it’s the go-to platform for enthusiasts. Explore innovative features and join a trusted community to enhance your gaming journey.
ReplyDeleteThis is a very clear and helpful blog. You explained Mern Stack and full stack development in a simple way that anyone can understand. I like how you covered the training options in Indore and also shared tips for beginners. Your writing is useful for students who want to start their career in web development. Great work.
ReplyDeleteGreat post with useful insights on modern web development! Choosing the right team is key to building successful applications. Businesses aiming for scalable solutions should consider Hire MERN Stack Developers . HourlyDeveloper has experienced professionals who can deliver high-quality and efficient results. Thanks for sharing such valuable information!
ReplyDeleteHi,Great post! I appreciate the effort you’ve put into explaining this topic so clearly. It’s rare to find blogs that are both easy to understand and actually useful. I’ve been researching Digital Marketing Course In Kolkata recently, and content like this really helps in making better decisions. Keep up the good work.
ReplyDelete